Overclocking is a procedure that’s meant to increase the clock speed of various components in your computer. This action helps squeeze more performance from your CPU, GPU, RAM, and monitor.
Since overclocking means pushing the components mentioned above to operate at higher speeds than they were designed to, you have to get it right!
This article will discuss everything you’d like to know about overclocking. We’ll try to keep the discussion simple so that you understand the topic better. Without further ado, let’s dive in!
What Is Overclocking?
Overclocking is the practice of resetting a computer component to run faster than what’s certified by the manufacturer. It’s mostly done to boost performance without incurring further expenses.
You may decide to overclock your CPU to boost the performance of an old computer if it’s not conforming to the requirements of new software.
If you are an avid gamer, you can opt to overclock their PCs so that they can get better performance and graphics when gaming.
Basically, users can overclock the processor, RAM, graphics cards, and motherboard chipsets.
Is Overclocking Safe?
Overclocking PC components is completely safe. However, you have to do it right and take the necessary precautions to avoid damaging your PC.
So, before you attempt to overclock any of your PC components, do some thorough research. This way, you’ll understand how to execute the procedure correctly and safely.
Overclocking gets dangerous if you don’t have a way to reduce excessive CPU temperatures.
If you decide to overclock your CPU, ensure that you have a cooler that can help keep the temperatures down.
Pros Of Overclocking
Here are some of the benefits you stand to reap from overclocking your computer components:
Improved Performance
The main goal of overclocking a GPU, CPU, RAM, or monitor is to increase its performance. Some games and software require strong graphics that can only be achieved by overclocking.
As long as you can increase the clock speed of your components, your computer will perform much better.
Cost Savings
If your rig no longer performs well, you’ll have to replace some of its components. Some users might prefer to upgrade their processor, RAM sticks, and graphics card.
Surprisingly, you can boost the performance of your hardware components without spending a dime. If you don’t want to spend money on new parts, overclocking is the way to go.
Maximize Speed
Most hardware manufacturers throttle the speed of their GPUs to reduce power consumption. This is a clear indication that you can push your GPU to perform better.
By overclocking your GPU, you’ll experience its full potential in terms of fast response time and better graphics.
Device Upgrades
Overclocking is one of the best ways to upgrade old rigs.
Some devices have non-removable hardware components, meaning that you can only upgrade them through overclocking.
Cons Of Overclocking
Here are some of the disadvantages and risks of overclocking your hardware components:
Overheating
Most users complain about their overclocked components releasing excess heat. Your heat sink and fans will have to work extra hard to keep the temperatures low.
Sadly, these components can’t manage to lower the temperatures on their own. As such, you’ll need to invest in a proper cooling system.
Increased Power Consumption
Overclocking your CPU and GPU means that your computer’s power demands will only go up. Remember that the fans have to run for a long time to keep the components cool.
As such, your power bills will shoot up by a significant percentage.
Noises
Since your overclocked CPU or GPU will release a lot of heat, your fans will need to run at maximum speed to dissipate the heat. As a result, the fans will produce loud noises that can easily be heard from other rooms.
Damaged Components
Overclocking is a risky procedure as it can damage one or two hardware components. So, if you make a single mistake, you may damage your CPU or GPU.
Besides, unrealistic overclocks can reduce the overall lifespan of your hardware components.
Nullify Warranty
Overclocking any of your hardware voids its warranty. So, if the component fails or gets damaged, the manufacturer can’t replace or repair it.
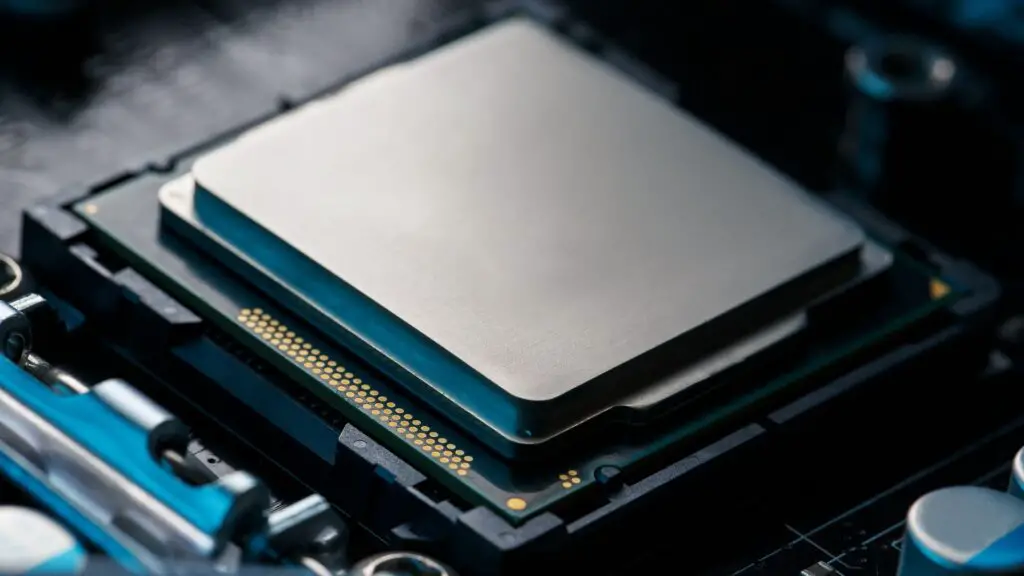
Overclocking Your CPU
CPUs are the most overclocked PC components. Users prefer to overclock their processors to improve the performance of their computers.
As long as you do it safely, you can benefit from higher frame rates, faster rendering, and a general increase in performance.
How To Overclock Your CPU
Overclocking was a challenging and rigorous process back then. However, manufacturers have made the procedure much easier over the years. Here is how you can overlock your CPU safely!
Identify Your CPU
Most people jump straight into the process by downloading the required tool. This is a huge mistake as you cannot overclock every processor.
First, you should figure out what CPU you have and whether it can support overclocking.
With a bit of research, you can quickly tell whether your processor supports overclocking.
Download The Needed Tools
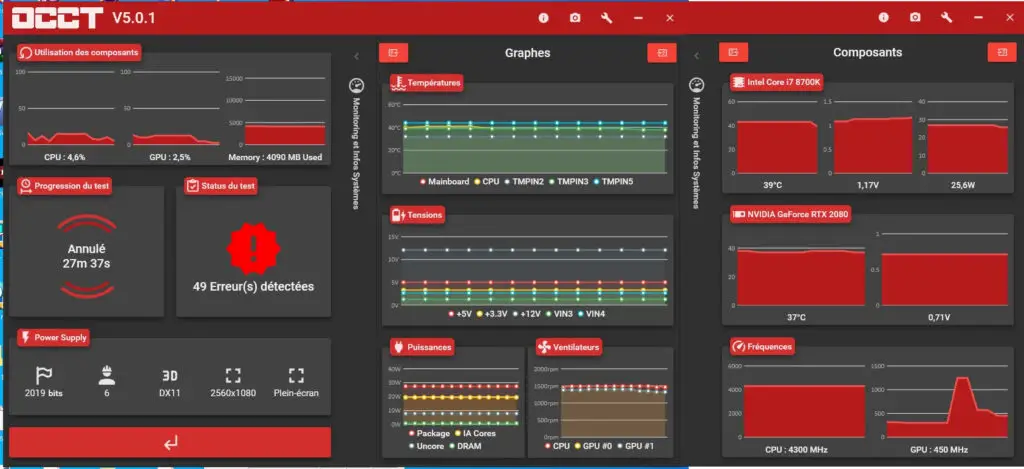
Before you attempt to overclock your CPU, you should download a couple of benchmarking and stress test tools. You’ll need these tools to test your overclocking results. Here are some of the software we’d recommend
- Real Temp – Keeps track of the CPU’s temperatures
- CPU-X – A monitor program that helps you see the voltage and clock speed in Windows. You can use it to ensure everything is working in harmony.
- Cinebench – should help evaluate your PC’s hardware capabilities and gauge relative performance by stressing your silicon and spitting out an index score.
- Prime95 – A benchmarking program used for stress testing your CPU
Run A Stress Test
Running a stress test at stock settings is pretty important. Most people skip this part and go straight to overclocking. This stress test should help determine whether everything is running well at stock settings.
If the results aren’t good, you probably have a defective chip. You’ll need to have it corrected before you even think of overclocking your processor.
Increase Your CPU Multiplier
You can begin overclocking as long as everything is okay. The first step is to boot your PC into BIOS and select the option for Ai Tweaker, Cell Menu, CPU Settings, or Frequency Control depending on your PC.
Navigate to the Adjust CPU Ratio option to increase the CPU multiplier. As you probably know, your CPU’s clock speed is worked out by multiplying the base clock (mostly set at 100Mhz) by the CPU multiplier.
For instance, if your processor uses a stock multiplier of 35, it will produce a clock speed of 3.5 GHz. To achieve high clock speeds, you’ll need to increase your multiplier.
We recommend stepping up the multiplier by one.
Once you do that, test whether your computer still boots. If it boots successfully, run a Cinebench test to check stability.
As long as the system is stable, you can go back and increase the multiplier some more. Don’t forget to benchmark and stress test to evaluate your CPU’s performance and stability.
Also, you might want to raise the multiplier for a single core before proceeding to the others. You don’t want to destabilize your processor by overclocking all the cores at once.
Set Your Voltage
Now that you’ve overclocked your CPU successfully, you’ll still need to increase the voltage.
While at it, you need to be careful not to overvolt your CPU. Excessively increasing the voltage can damage the CPU, motherboard, and VRMs.
To avoid any losses, you should raise the voltage in increments of 0.025. Ensure that you run a stress test after every increment to confirm whether the system is stable.
If it’s stable, confirm whether the temperatures are at an acceptable level.
You can keep increasing the CPU voltage until you reach the maximum voltage and temperatures. Just make sure you run the stress tests after every increment.
Sometimes you’ll have to lower the multiplier or base clock if the system becomes unstable.
The BIOS method is the most effective when overclocking your CPU. However, you can still use special software to overclock your processor.
Overclocking Your GPU
Overclocking your GPU is the cheapest way to get a high FPS. So, if you are an avid gamer, you might want to overclock your graphics card no matter how good it is.
Luckily, GPU overclocking is not as tricky as CPU overclocking. All in all, GPU overclocking will still require trial and error.
How To Overclock Your GPU
Here are the steps on how to overclock your GPU:
Download The Necessary Software
Overclocking your graphics card will require you to have some software.
The MSI Afterburner will be the overclocking software, while Furmark or 3DMark will be the stress testing software. While at it, get to grips with the MSI Afterburner software to understand its UI.
Benchmark The Stock Settings
You should never overclock your GPU before ensuring that it’s stable at normal clock speeds. Run Furmark or 3DMark to benchmark the clock speed, temperature, FPS, and performance.
You can screenshot the results or write down the numbers somewhere. These numbers will show how much performance you’ll have gained after you are done with overclocking.
Overclock Your GPU
By now, you are ready to overclock your graphics processor. First, start by running the Afterburner software. You’ll notice that the interface has four key elements, which include:
- Core clock speed
- Memory clock speed
- Control panel
- GPU temperature
Locate the power limit slider and push it all the way up. Do the same for the temperature limit slider. However, experts recommend setting the temperature limit to 90C for AMD and 80C for Nvidia.
Now increase the core clock by 5% of the default value or 10MHz. Hit the Apply button and run the stress tests once more.
Ensure to keep an eye on the temperatures as the benchmark runs. Once the test is done, note down your FPS and increase the core clock by 10MHz again. Benchmark and repeat the entire process until you run into problems.
Basically, you’ll be bumping up the cores and benchmarking until the benchmarking either crashes or weird lines appear across the screen.
If that happens, you’ll have to reboot your PC and drop down the core clock by 10MHz. You have to find a sweet spot before proceeding to the next step.
Increase Your Memory Clock
If you are happy with the core GPU clock, you can proceed to overclock your GPU memory. You can opt to overclock the memory by 10% or by around 25MHz.
As usual, you’ll have to run the benchmark after every increment. Repeat the procedure until you see signs of instability.
Once you do, reduce the memory clock by 10% or 25MHz and run the benchmark. If it’s stable, proceed to the next step.
Run A Final Stress Test
You have to confirm that everything is working in tandem before finalizing the process. As such, you’ll need to run the benchmark one more time.
You’ll have to confirm that the GPU temperatures are not over 80C for Nvidia and 90C for AMD. If they exceed the limits, you’ll need to increase the fan speed until the temperatures drop.
You can now fire up some of your favorite games to test whether the GPU overclocks work. If they seem okay, then you found the ideal settings for your gaming rig.
If the game crashes, you’ll have to drop down the memory clock or core clock until you gain stability.
Overclocking Your RAM
Like a GPU or CPU, you can also overclock your RAM. Overclocking your RAM can result in significant performance enhancements.
You’ll find it easier to use multiple apps simultaneously. Besides, gamers experience an increase in FPS once they overclock their RAM. Let’s look at how you can overclock your RAM.
How To Overclock Your RAM
Here are the steps to follow when overclocking your RAM:
Find Out Some Info About Your RAM
You’ll need to have some general information about your RAM when performing an overlock. We recommend using the CPU-Z app to find out the memory and timing information.
On the CPU-Z app, click the Memory tab to view the current DRAM frequency (Multiply the DRAM frequency shown by two to get the correct figure) and the latency timings.
Click the SPD tab and take note of the figures that are in the Timings Table. Don’t forget to take a picture of the data in the Memory tab as well.
Go To BIOS
Reboot your PC and enter into BIOS. Launching BIOS differs depending on your computer. You might have to press the Delete key until BIOS loads or one of the F-Keys.
Keep in mind that the BIOS menu differs depending on your motherboard.
Load The XMP Profile
You’ll have to navigate to the XMP profile to overclock your RAM. The Extreme Memory Profile has its own set of voltage and frequency settings.
This makes it easy to overclock your RAM as you won’t have to tinker with the internal settings. Choose your preferred XMP settings or profile. Save the settings and reboot your computer.
Perform A Stress Test
Once your computer restarts, you’ll need to run a stress test to confirm whether your overclock is stable. Remember that a RAM stress test is quite different from a benchmark. For this test, you’ll need to use MemTest64.
You might want to run the stress test for one day to ascertain that everything is stable. Remember to close all the open applications and programs running in the background.
Also, check the Stop on error and Run Indefinitely boxes before clicking the Begin Test button.
Don’t forget to observe your PC during the test. If there are no issues or crashes, it means your overclock was successful.
Overclocking Your Monitor
Monitor overclocking is a common practice among gamers. They do so to achieve a high refresh rate when playing FPS games.
Unlike GPU and CPU overclocks, monitor overclocks are simple and stable. So, if you are looking to increase your monitors refresh rate, follow the steps discussed below:
How To Overclock Your Monitor
Overclocking your monitor is the only way to get a decent refresh rate without incurring costs. You can overclock your 60Hz monitor to 75Hz or your 120Hz monitor to 144Hz.
These minor increments will better your gaming experience. Here is how you should go about it:
- Download Custom Resolution Utility Tool (CRU). Most people prefer to use the CRU app because it is compatible with both NVIDIA and AMD GPUs.
- Once you download the app, extract it to your desktop or any other location.
- Now right-click the main CRU app (CRU.exe) and run it as administrator.
- Once the app opens, click the Add button under the Detailed resolutions
- Key in your display resolution and target refresh rate, then click OK. If you are overlocking a 60Hz monitor, do not enter a refresh rate that’s more than 75Hz.
- Click OK on the main interface to close the app
- Head over to the extracted CRU folder. Right-click on the restart64.exe and run as administrator.
- The screen should flicker or go black for a couple of seconds and go back to normal. This should tell you that overclock worked. If the target refresh rate is too high, the screen will blackout for around 10 – 15 seconds. You’ll then have to repeat steps 3 to 7, but this time you’ll need to reduce the refresh rate to 70Hz or 65Hz.
- Now it’s time to apply the new refresh rate. Click Windows Key + S and search “Display Settings”. Click on the top result to open Display Settings
- Click on the Advanced Display Settings option
- Scroll down and click Display adapter properties to open a new window
- Click the Monitor tab
- Choose your overclocked refresh rate from the drop-down options and click Apply
That’s how you overclock your monitor. You can use other methods, but the CRU technique is the easiest and most popular.
Is Overclocking Worth It?
Overclocking computer components is common among users, but is it worth the risk?
Most people argue that overclocking their processors benefits them from a performance standpoint. While the process is a bit tedious, you’ll no longer have to worry about upgrading your CPU for some years to come.
When it comes to RAM overclocking, you might want to sit this one out as it doesn’t have significant benefits. Besides, the process of overclocking your RAM is pretty complex.
Unless you are using an AMD APU, you should purchase a better RAM instead of overclocking.
Monitor and GPU overclocks have also proved to be worth the effort. These overclocks tend to favor gamers and graphic designers as well.
As long as you can achieve decent GPU and display overclocks, you’ll enjoy better graphics, high refresh rates, and improved performance.
If you want to upgrade your rig without spending money, you should consider overclocking the components we’ve discussed.
Frequently Asked Questions
Here are some of the questions people ask concerning overclocking:
Is overclocking good for gaming?
Overclocking your CPU, GPU, and monitor can improve your gaming experience. Overclocking should reduce rendering times, improve refresh rate, and increase in-game performance if done right.
Does overclocking a CPU reduce its lifespan?
It depends on how you overclock it and if you can keep it cool. Most CPUs fail due to heat degradation. As long as you keep the CPU temperatures at the normal level, it will serve you for a long period.
Is there a limit to overclocking?
There is always a limit as to how far you can overclock your hardware components. However, you cannot know the limits until you try.
If you exceed the limits, your system will become unstable. That’s why you have to perform benchmarking and stress tests when overclocking your hardware.
What are the requirements for overclocking?
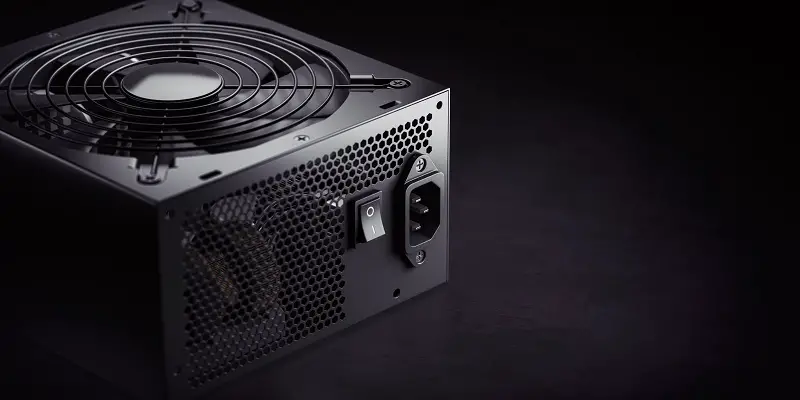
First, you need to confirm whether your motherboard supports overclocking. You’ll also need to purchase a strong cooling system to help dissipate the excess heat.
Additionally, ensure that your PSU can provide enough power. Finally, download stress test software and data display software.
Final Thoughts!
Overclocking is no longer complicated as it used to be a couple of years ago. Therefore, you can attempt to overclock your hardware as long as it supports it.
Remember to be extra cautious when overclocking your CPU, RAM, and GPU. As long as you follow the guides we’ve provided, you’ll be good to go.